As an organization that is on Google Workspace, you may need to configure printers/scanners to send emails using a domain email address. Google Workspace simplifies this configuration by providing a dedicated utility for this purpose called an SMTP relay. We recommend using the Google Workspace SMTP relay service, to send mail from these devices because it authenticates with an IP address. making it the most secure option. It also allows you to configure printers/scanners to send emails; up to 10,000 emails, and the best part is that: it’s FREE as you do not incur any additional license costs.
Step 1: Configure SMTP relay within Google Workspace
The routing configuration to enable SMTP relay service within your Google Workspace account needs to be done within your Google Workspace admin console.
To configure the SMTP relay within your Google Workspace account, sign in as a super admin at admin.google.com
Click on Apps and navigate to Google Workspace and select Gmail
Scroll down and select Routing
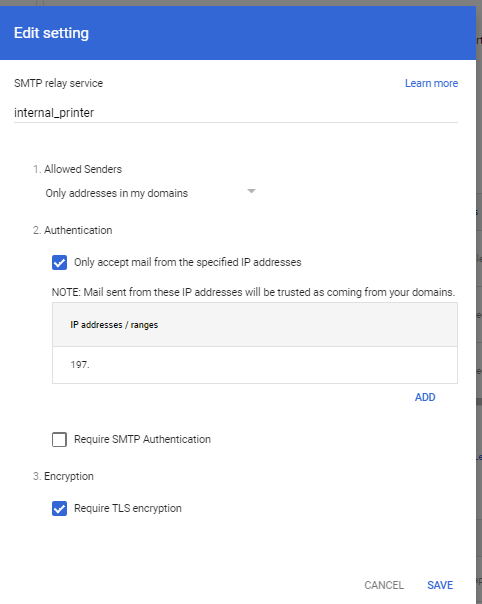
Under Routing, select SMTP relay service. To add a new routing, click on Configure. If another rule already exists, click on ADD ANOTHER RULE, this will pop up a module window that allows you to configure the routing rule.
First you will need to give the rule a name so as to easily identify what service the relay is for e.g. Internal printer
For Allowed Senders select: Only addresses in my domains —The sender doesn’t have to be a recognized Google Workspace user but must be in one of your registered domains. This can be useful when you have third-party or custom applications that need to send messages.
For Authentication; Select Only accept mail from the specified IP addresses
Click on Add to enter the IP address of your system,
Enter a short description of the IP address or range e.g. Our Public IP
Type in the Public IP address this can be either in IPv4 or IPv6 format. Note use your own public IP address for your organization or where the printer is as private IP addresses are not supported.
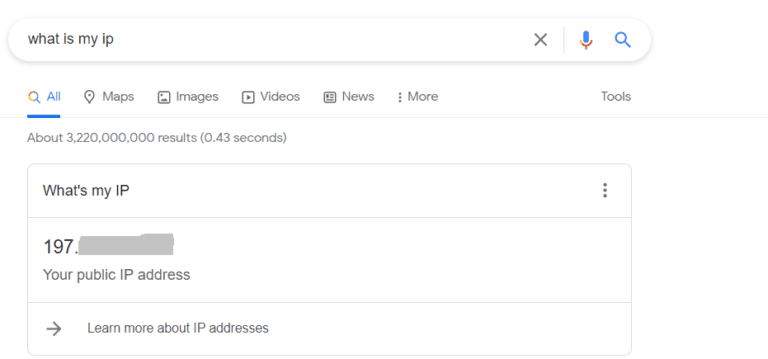
*To get your Public IP Address Open a new tab on your browser and type in “What is My Ip”
'What is my IP' check
Copy the resulting IP address and paste it into the required field for the IP address.
Check the Enable box to enable or disable the IP address or range.
To save the IP address click Save
Under Require SMTP Authentication leave this field blank.
In the Encryption section, check the Require TLS encryption box to require that the communication between your server and Google’s server be TLS encrypted, including the message contents.Note: If your email server(printer in this case) does not support TLS, do not check this box. If you check this box, Google rejects messages that are not encrypted.
At the bottom, click Save.
SMTP Relay routing rule
Note: It can take up to an hour for changes to propagate to user accounts. You can track prior changes using the Admin console audit log.
Step 2: Make Printer Configurations
To configure printers/scanners to send emails to your employees you will need to connect to the printer and configure the SMTP relay settings.
Note: Some screen settings may differ from printer to printer but the configurations are the same. In our case, we are configuring a Kyocera TASKalfa 5550ci
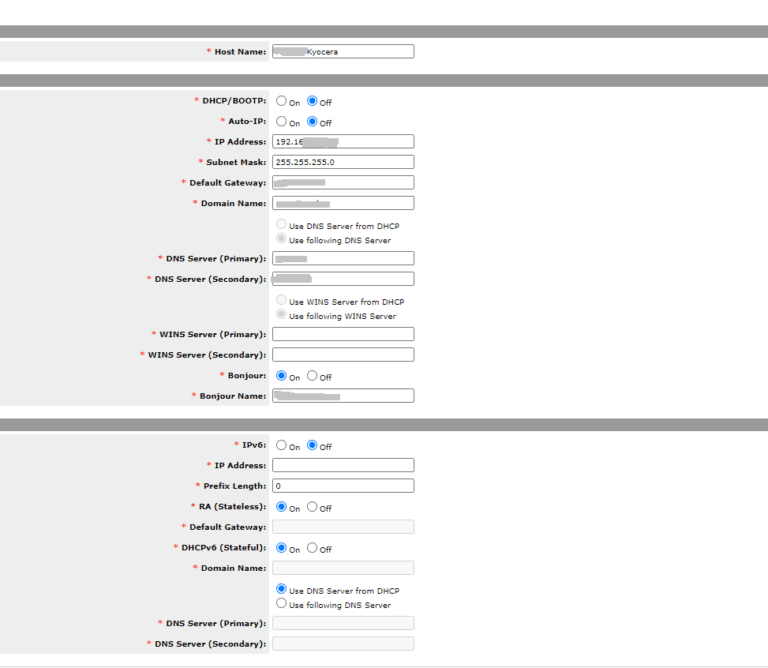
First check it’s IP address as below, after connecting the printer to your network
Printer IP settings
Connect to the printer via a browser using the IP Address. And login as an admin. For most printers, the default administrator credentials are: User Name: Admin Password: Admin
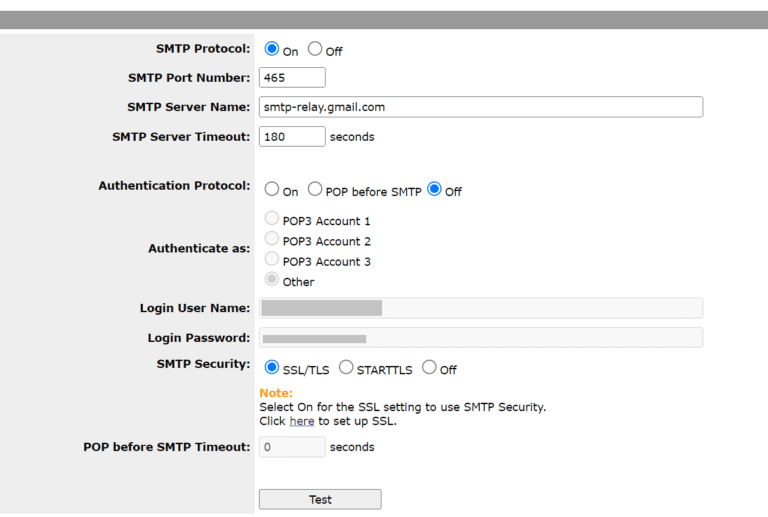
Go to protocol settings to configure the following :
Enable SMTP Protocol by clicking on the radio button next to On
Set SMTP Security to SSL/TLS
Navigate to the advanced settings Tab for your printer after logging in.
Under E-Mail, select SMTP and click on General
The SMTP Protocol setting should now be On. Enter the following details:
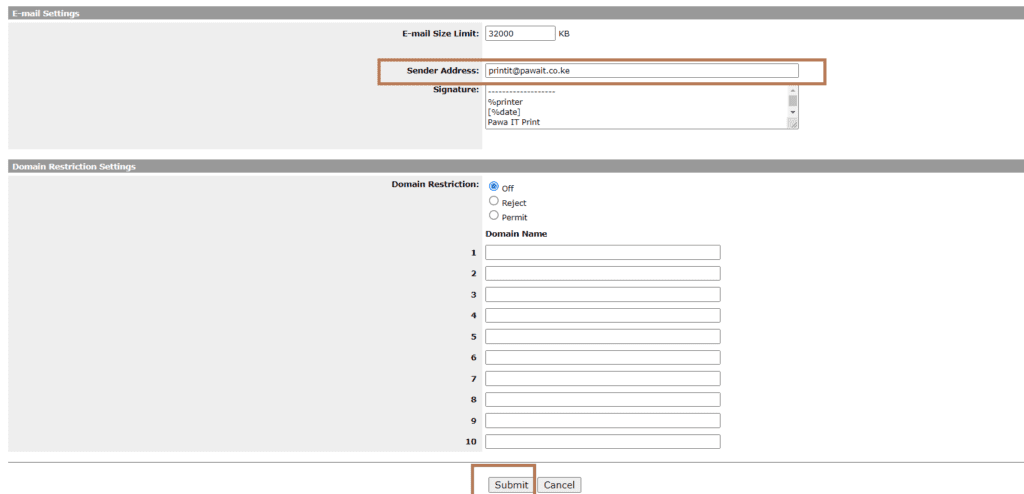
Optional:Signature : You might include a signature to be received by the users getting the scan documents you may enter the same by typing it i.e “Sent from Printer”
Set the domain restrictions to be off and click on Submit
Email sending settings
To confirm the settings are configured properly confirm by clicking on Test .
Outcome
Once a user performs a scan for a file within the printer, they can send an email with the scanned document and access it from within their mailbox as per the screenshot below: