For most of us, Google Calendar is our Personal assistant. Just like a personal assistant, we use it to schedule meetings, set reminders, block out our time when we need to focus on specific tasks, and even share our availability with team members. Basically, if it’s not on the Calendar, it did not happen!!
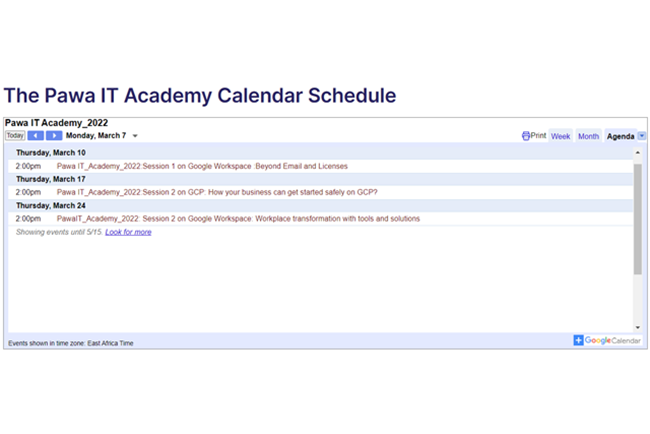
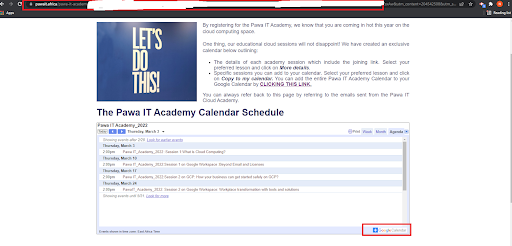
However, most individuals and organizations alike, are not aware that Google Calendar can be much more than a place to schedule meetings. It is also a powerful event-planning tool. For instance, as an organization, you certainly have events that are either held virtually or in person. You would want to send out invites to your event attendees and as a plus, enable the attendees to add these events to their calendar so that they don’t miss out on them. But how exactly can you do this with Google Calendar? First, you would create an event Calendar and share it publicly for your planned events. Next, you can then publish your event(s), embed the calendar to a website, and even share the calendar with users who don’t use Google Calendar. As always, we eat our own dog food and have put this into practice with one of our online events and the end result was nothing short of magnificent. You can have a look at it here before we delve into the step-by-step process of how you can achieve this look for your next event: https://pawait.africa/pawa-it-google-cloud-academies/
Let’s get started!
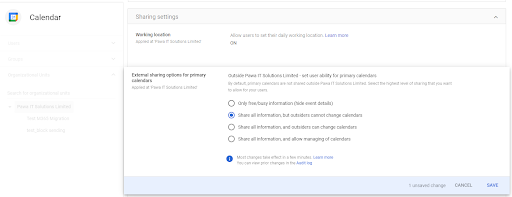
To enable public sharing of your calendar so that external participants get to view the event details, your Google Workspace admin should enable External Calendar sharing from the Admin console:
Navigate to Google Calendar by accessing Apps> Google Workspace > Calendar.
Under Settings for Calendar select External Sharing Options for primary Calendars. To apply the setting to everyone, leave the top organizational unit selected. Otherwise, select a child organization unit.
From here you can apply the highest level of sharing permissions to the calendar and events that you want to allow external participants to have.
Select Share all information, but outsiders can not change Calendars: This option will only allow external participants to view the event details, except for all events marked as private such as
Find the time zone setting for the calendar.
Subscribe to email alerts when events are created, changed, canceled, responded to, or coming up.
Click Save to save your changes. Now the users within your Google Workspace account can publish any calendar to a website or share the link for external people to save the calendar under any calendar solution they are using and be able to view the event details.
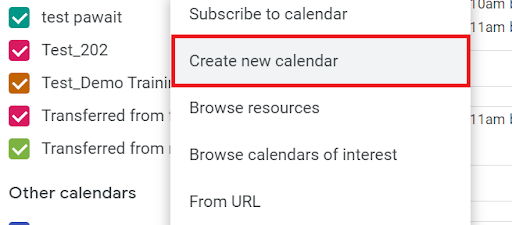
Create the secondary calendar for their event by accessing Google Calendar:calendar.google.com.
On the left, next to “Other calendars,” click Add other calendars and then Create a new calendar.
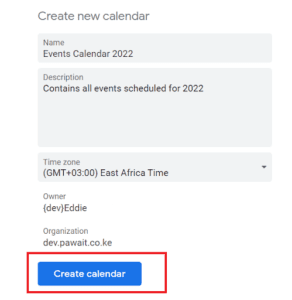
Add a name and description for your calendar. For the name i.e Events Calendar 2022 and a description, such as Contains all events scheduled for 2022.
Once done click Create calendar.
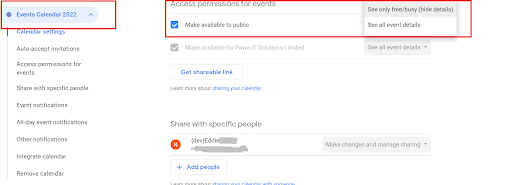
Once the calendar is created, you can locate the calendar and manage its settings from the left side panel, scroll down and select the calendar we just created. Under Access Permissions for Events select Make Available Public and select See all event details, to allow external parties to view all details for each Public event available on the calendar.
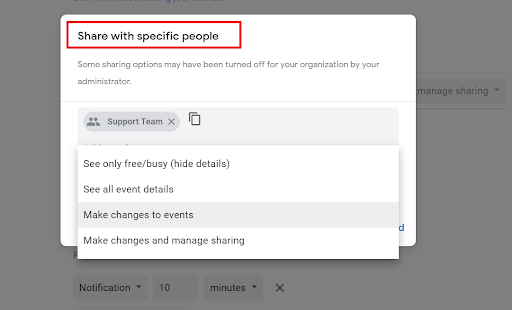
If you want to share the calendar, with team members to allow them to manage the calendar and be able to add or edit events on the calendar scroll down to Share with specific people. And click Add People. To add a person’s or Google group’s email address. Use the drop-down menu to adjust their permission settings. Under the options for the team members select either Make changes to events or Make changes and manage sharing. With giving the permission to make changes to events the team members should only be able to change the date, time, and event descriptions while allowing them to make changes and manage sharing, the team members may manage the full aspects of the calendar while also being able to edit the sharing permissions of the calendar.
Once done click Send to invite the team member or members to manage the calendar.
To Publicly share the calendar we created and all the public events on it, you can:
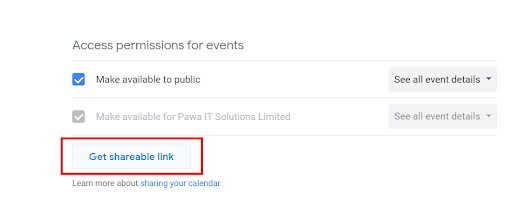
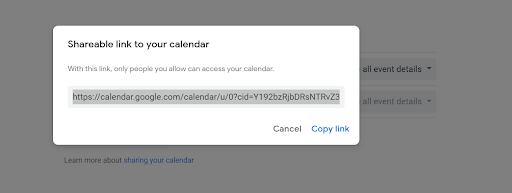
1. Get Shareable Link
To Share the calendar via a link in an email, or as a hyperlink in a body of the email, scroll to Access permission for events section of your calendar settings, click the Get shareable link, button
And then click on Copy link
Once you share the link with anyone either via a naked link in an email or hyperlinking it in an email or via a button on a website, all a users need to do is click the link which opens in Google Calendar with a pop up to add this calendar and all its public events under the calendar.
2. Embed the calendar on a website
You can add an interactive version of your calendar to your website, and add buttons for your website visitors to save your Public calendar events.
On a computer, open Google Calendar: calendar.google.com. You can only get the code to embed in your website from a computer, not the Google Calendar app.
In the top right, click Settings.
On the left side of the screen, click the name of the calendar you want to embed.
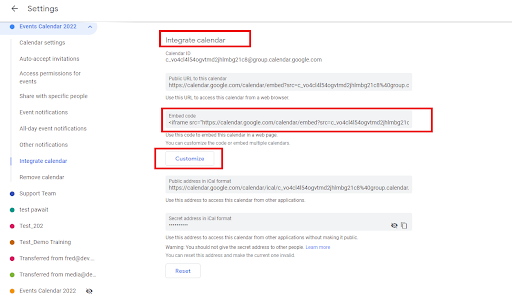
In the Integrate calendar section, copy the iframe code displayed. You can paste the code under the webpage you want to embed the calendar widget to. This can also include Google Sites
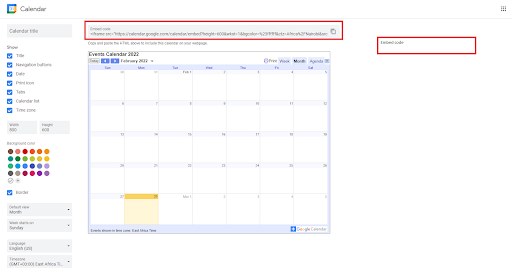
Optional under the embed code, click Customize. This will open a new tab to let you customize the details of the calendar and how they will appear on a web page such as:
Height: how tall the calendar will appear on your page (measured in pixels)
Width: how wide the calendar will appear on your page (measured in pixels). You can also leave this value empty so that the calendar takes up the entire page or column.
View: You can choose how the calendar will appear by default, either in the Week, Month, or Agenda view.
Display Options:
Show week, month, and agenda tabs: Allow anyone who sees the calendar on your page to switch calendar view with this option.
Show calendar name: Show the calendar name.
Show navigation buttons: Allow anyone who sees the calendar on your page to click to the next week/month.
Show current date range: Displays the date range of the calendar. This option will also produce a drop-down menu that will display a mini-calendar to allow a user to switch to a different week/month.
Include border around Google Calendar: Displays a border around the entire Google calendar to separate from other content on the page.
Include title: This will display a title outside of the Google calendar, within the border. This is different from the Calendar name – you can choose what the title will be.
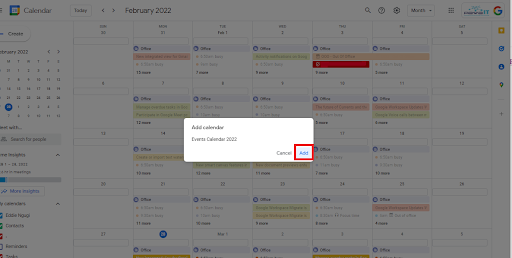
Once embedded on a webpage anyone on the internet can be able to view and subscribe to the calendar. This way one can be able to view all the public events on the calendar without singing into any calendar solution and once they decide they want to attend to any or all the events on the calendar the user can add the full calendar to their Google Calendar by clicking on Add Google Calendar.
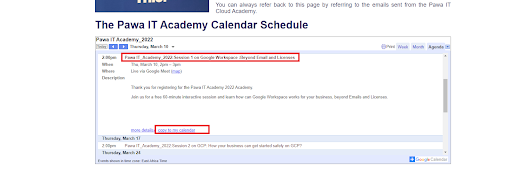
Users can also add specific events to their calendar rather than the full calendar if they wish by clicking on the specific event to view the details and selecting copy to my calendar under the event’s details.
3. Sharing the calendar with users using other solutions
For users who might not primarily use Google Calendar, and use other calendar solutions i.e Outlook, iOS or Zoho, you will have to share the calendar in iCal format.The iCal address only works if the calendar is public.
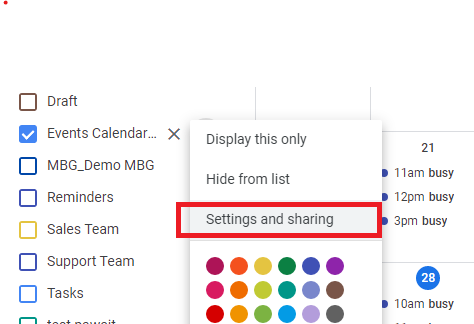
Access Google Calendar and select the Public calendar you have created from the left-hand side of the screen, click on the three-dot button, and select Settings and Sharing.
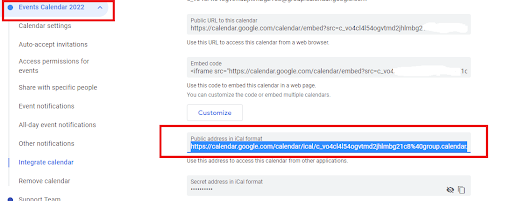
Under Calendar Settings, scroll down to the Integrate calendar section, to access the Public address in iCal format, copy this link and paste it either in an email body or hyperlink it to a webpage where people can download it and access using the various calendar solutions they use.
4. Add events to public calendar
All events you add to the public calendar will match the calendar’s default settings. For example, if the default is set to “public,” anyone can find your new event.
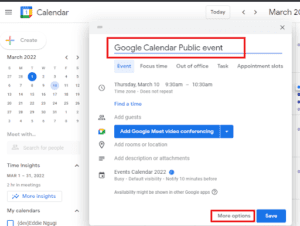
Click the Create Button, add the event details i.e Title. Tip you can use the keyboard shortcut Shift + C to quickly create an event in any view
To add the events details such as description and change the event date click More options
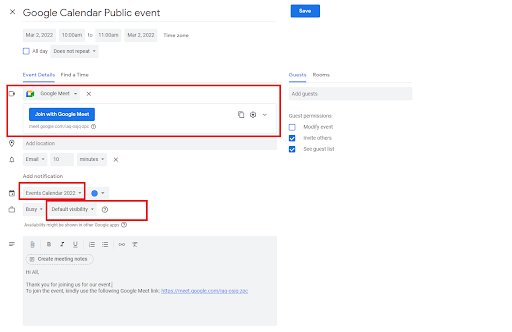
Make sure that the event is created within the preferred public calendar our this case: Events Calendar 2022if not you can change this by clicking on the calendar name next to Calendar.
Add a Google Meet link by clicking on Add Google Meet video conferencing.
You may include a description of the event, what the event will entail, and how users may join the event. Once done click Save. The event appears with both the calendar name and the name of the person who created the event. Now anyone can access all the calendar events created within the calendar.
Our Spring Sale Has Started
You can see how this popup was set up in our step-by-step guide: https://wppopupmaker.com/guides/auto-opening-announcement-popups/
Our Spring Sale Has Started
You can see how this popup was set up in our step-by-step guide: https://wppopupmaker.com/guides/auto-opening-announcement-popups/
Our Spring Sale Has Started
You can see how this popup was set up in our step-by-step guide: https://wppopupmaker.com/guides/auto-opening-announcement-popups/