The possibility of your passwords being compromised, is more common and more likely than you think.One of the best ways to protect your account is to have an extra form of verification in place.
Here’s where 2-step verification or two-factor authentication comes in. It helps keep out anyone who shouldn’t have access to your account by requiring a second step after you enter your password.
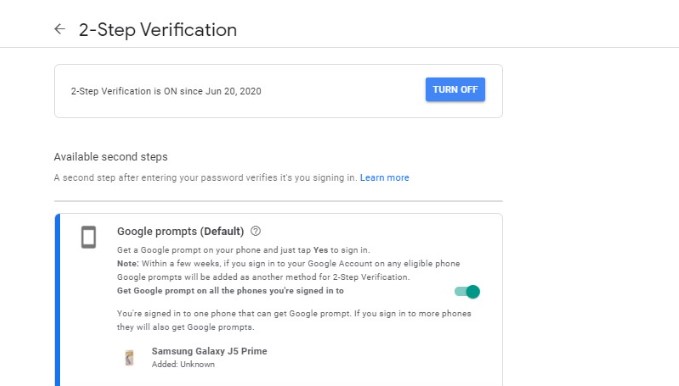
Phone prompts, also known as “on-device prompts”, are more secure than text or voice codes, as a form of 2-Step Verification. Your phone becomes the primary authentication method/device. They’re also easier to use, as they avoid requiring users to manually enter a code received on another device. By making prompts the primary method for more users, Google hopes to help users take advantage of the additional security, without having to manually change settings—though they can still use other methods of 2-Step Verification, if they prefer.
We recommend Google prompts instead of text message (SMS) verification codes to help you:
Avoid phone number-based account hacking. Hackers may try to steal verification codes to help them break into your account. Google prompts help to protect against this method of account hacking, by sending them more securely to only your already signed-in devices.
Get more info about sign-in attempts. To help you find suspicious activity, Google prompts give you info about the device, location, and time of the sign-in attempt.
Block suspicious activity with just one tap on your device. If you didn’t try to sign in to your account, tap ‘No’ on the notification to secure your account.
Step-By-Step Instructions On How To Enable 2-Step Verification
Enabling Organization-Wide 2-Step Verification
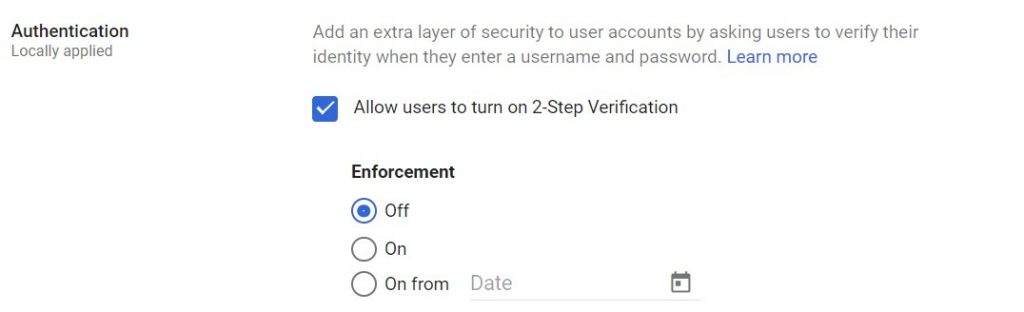
As a Google Workspace Admin, you can enable 2-Step Verification within your organization’s Google Workspace Account, to allow users to choose to use this feature if they wish or you can enforce it as a mandatory security feature for every user’s account. Here’s how :
Sign in to your domain’s Google Admin console at admin.google.com
Go to Security > 2-Step verification
You can allow users to turn on 2-Step Verification on their end or you can mandatorily enforce it to every user within your organization and even choose the date you would want the enforcement to take effect.
Figure 1: Turning off/on enforced 2FA for the entire organization
You can also enable this feature for particular users within an organization unit. E.g. you can set 2FA to be mandatorily enforced for users in the finance department or even among your company executives.
Enrolling into 2 Factor Authentication On Each User Account
Tell all users to turn ON 2FA by following these steps if the Google Workspace Admin hasn’t enforced it on all accounts.
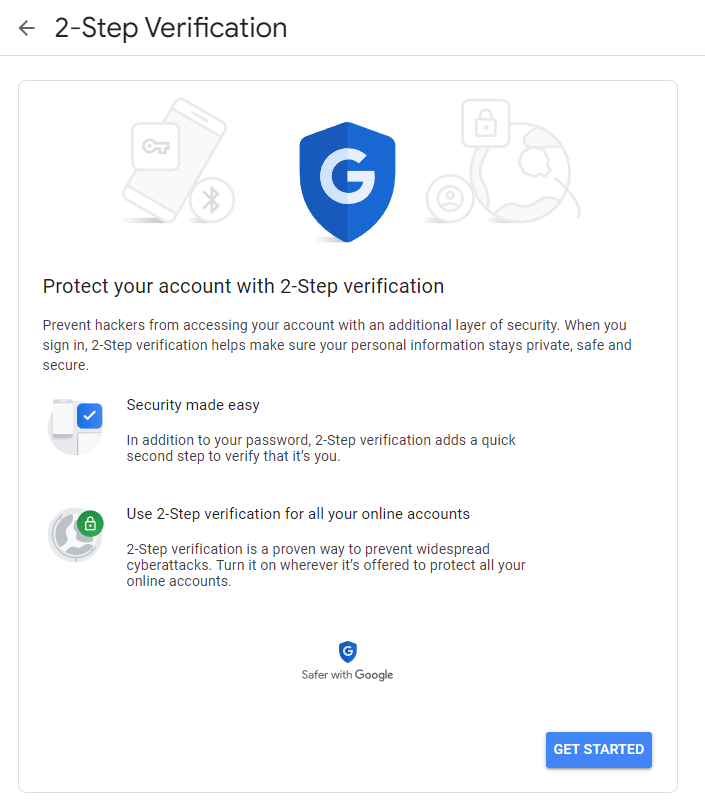
On the ‘Signing in to Google’ panel, click 2-Step Verification.
Figure 3: Setting up 2FA
Click Get started.
Follow the steps on the screen.
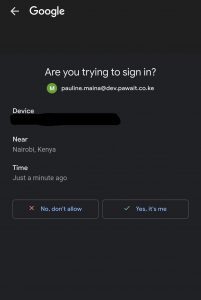
On your phone, you will receive a “Are you trying to sign in?” prompt. This prompt tells you when and where your password was entered, and then asks you to confirm or block the sign-in attempt by simply tapping your mobile device.
Figure 4: 2FA phone prompt
Click “Yes, it’s me” to verify the device.
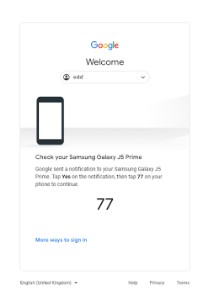
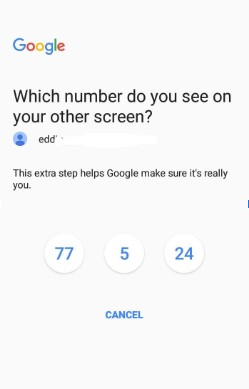
On some occasions, you may receive a prompt containing a number as shown below.
Figure 5: 2FA number prompt
Tap the number that coincides with the number given to verify the device.
Figure 6: 2FA number verification prompt
You have successfully enabled 2 step verification. Additionally, if a user doesn’t have 2-Step Verification turned on, this will not apply since each personal user can choose to turn this feature on or off but it will be ON by default to every organization.
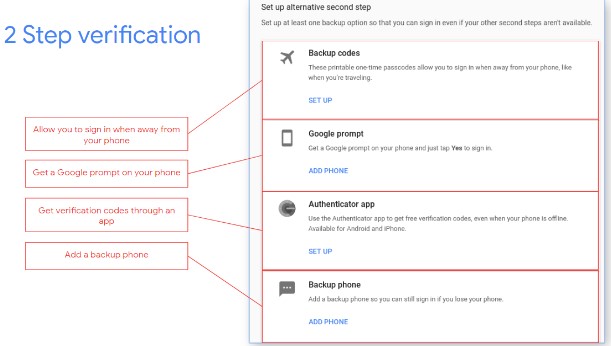
Setting up backups for 2FA
Backups help you get back into your account if you forget your password, lose your phone, or can’t sign in for any other reason. With backups, you’re less likely to get locked out of your account.
Figure 7: Account backup methods
There are four types of backups you can set up for your account:
Backup codes. You can download a list of codes which you can use to recover your account. Note that these are one-time codes so you should store them securely and within easy access.
Google prompt. These are prompts you receive on your default devices to verify a sign-in attempt into your account by a new device. These are the prompts mentioned above in the 2FA account setup instructions.
Backup phone. You can add your mobile number as a recovery mechanism in case you lose your phone. By adding your phone number, you can choose either to receive the verification code via a text message or a phone call.
Google Authenticator app. This is an application in which you can set up various accounts via scanning a QR code. You will receive a code which changes frequently for security purposes. The procedure for setting up the Authenticator app is given below.
Setting up the Google Authenticator App
In addition to using the Authenticator app as a backup, you can use it as a verification method for your Google account. To do this:
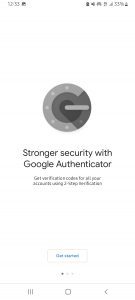
Go to the Google Play store or iOS App store and install the Google Authenticator app.
After installing, launch the app and click Get Started
Figure 8: Setting up Google Authenticator app on mobile device
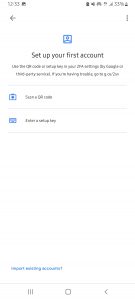
You can scan a QR code or enter a setup key if you have one. Alternatively, you can click the ‘Import existing accounts?’ option at the bottom of the screen.
On the ‘Signing into Google’ panel, click 2-Step Verification.
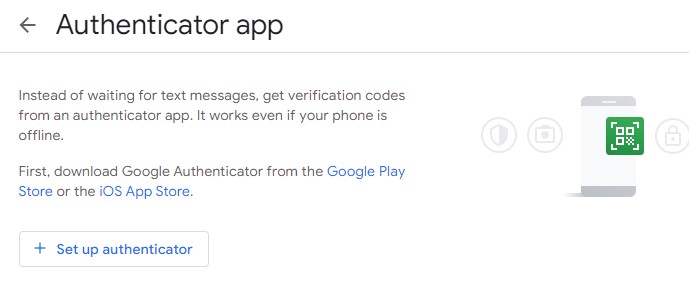
Click Authenticator app
Figure 9: Selecting Google Authenticator app
On the Authenticator app panel, click Set up authenticator. A new dialog box will appear containing the QR code.
Figure 10: Setting up Google Authenticator app on web browser
On your phone, click Scan QR code. Allow the access permissions and scan the QR code.
Figure 11: Selecting account setup method on Authenticator app
The account will be added and a code will be provided. Note that this code changes frequently.
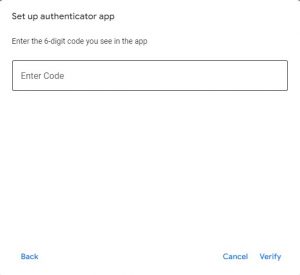
On the authenticator panel containing the QR code, click Next.
Enter the QR code and click Verify.
Figure 12: Entering the verification code
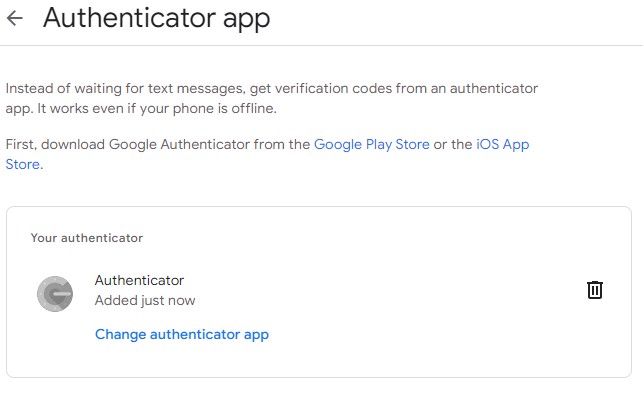
The Authenticator app is set up as a 2SV and backup method.
Figure 13: Account setup on Authenticator completed
Disable 2-Step Verification
If a user wants to personally disable 2SV using a prompt they can do it on their own. (We highly do not recommend this). By following these steps a user will disable 2SV:
On the Signing into Google panel, click 2-Step Verification.
Click on Turn Off
Figure 14: Turning off 2FA
Access Emails on Apps that don't Support 2FA
Desktop email clients (think Microsoft Outlook or Mozilla Thunderbird or Evolution) cannot send a two-factor challenge response. The solution? An app-specific password. This is a special password tied to your account that’s used only for a specific program, service, or situation.
Steps on How to Create Application-Specific Password in Gmail and Use it in Outlook
To generate a new password for an email program, utility, or add-on to access your Gmail account through IMAP or POP with two-step authentication enforced:
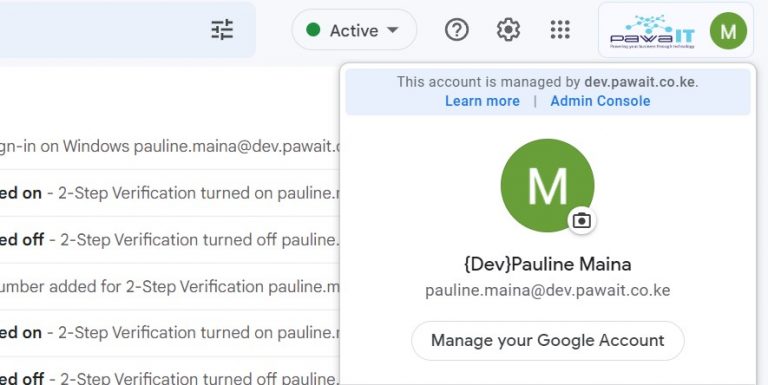
Click your name’s icon or profile picture in the Gmail inbox’s top right corner.
Tap or click the Manage your Google Account button in the tab that has appeared.
Figure 15: Managing your Google account settings
Click the Security button in the left-hand sidebar.
Scroll to the Signing into Google section.
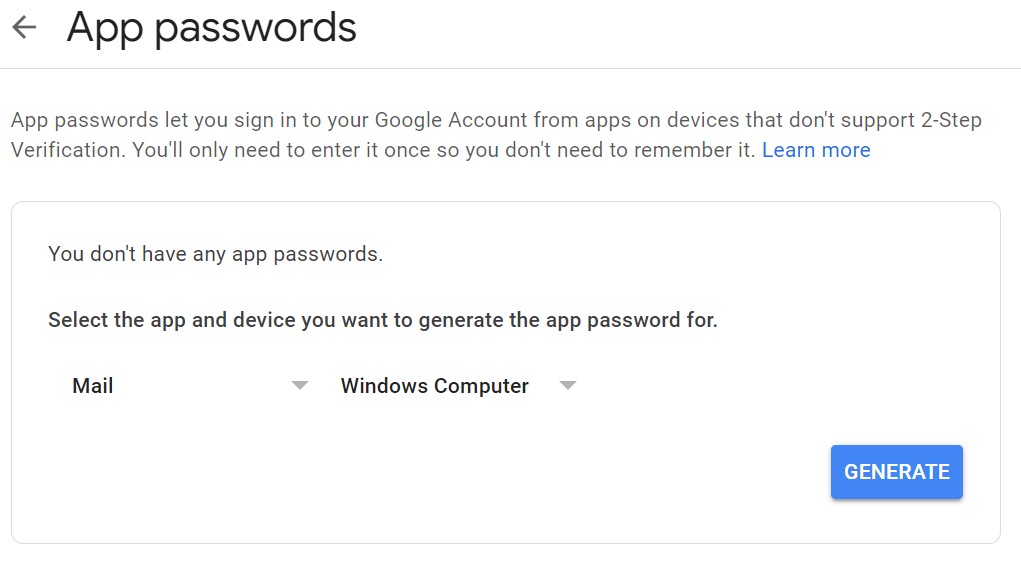
Under the Password & sign-in method section, click App passwords.If prompted for your Gmail password, enter your password over Enter your password and click Next.
Make sure Mail or Other (custom name) is selected in the Select app drop-down menu. If you selected Mail, choose a computer or device from the Select devicemenu. If you selected Other (custom name), type the application or add-on and, optionally, device (like “Mozilla Thunderbird on my Linux laptop”) over e.g. YouTube on my Xbox.
Click Generate.
Figure 16: Generating app passwords
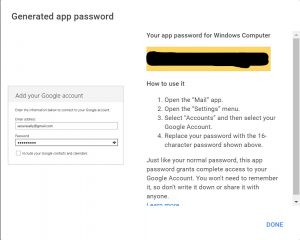
Find and immediately use the password under Your app password for windows computer if you selected it. Type or paste the password into the email program, Gmail add-on, or service immediately, sticky notes, or notepad. You will not see it again.
Figure 17: Generated app passwords and instructions on how to use it
Click Done.
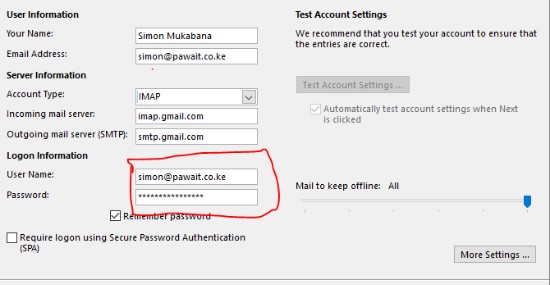
Enter this password in Outlook prompt, That is it!!