
Episode 5: Deleting Accidental Sent emails in your domain using GAM
As an organization that uses Google Workspace, many a time you will find a user has sent an internal email and copied someone within your team inadvertently, or a member of your organization Google Workspace has received an email in error and one would like to recall or delete the email before it has been read by the recipient.
For organizations that use Google Workspace Enterprise Plus, the administrator within your tenancy can perform the email deletion using the Gmail message investigation tool, but what if your organization is not on this Google Workspace plan? Worry not we got you as the same can be achieved by running one GAM command
Prerequisite
- Download and Install GAM (Google Apps Manager) on your device or server;
- Download GAM from here https://github.com/GAM-team/GAM/releases
- Install GAM for the step-by-step process to install GAM
- Email message ID or IDs for emails you want to delete.
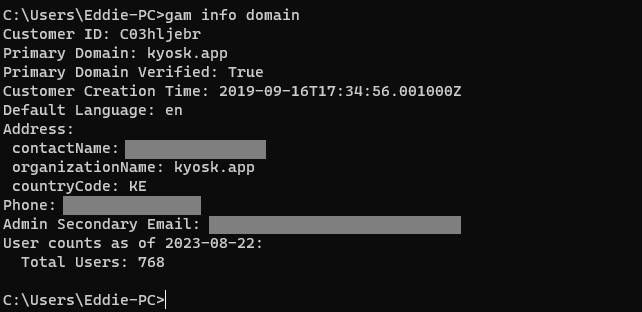
Once GAM has been installed on your device open the command prompt for a Windows device
by click on Windows + R and type CMD. Once this opens up, run the following command gam info domain. This will confirm the authorized Google Workspace domain for the GAM project on your PC.
When you send an email through Gmail, a unique Message ID is added to the email header as per the RFC 822 specification. To know the ID of your message, open the email inside Gmail, go to the 3-dot menu, and choose Show Original. The RFC822 Message ID will be displayed in the first line of the email message header, as shown in the screenshot.
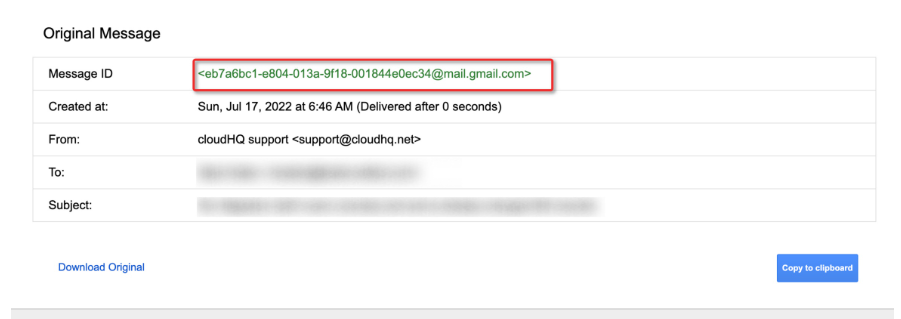
The Message ID of an email message is exactly the same for the sender, the recipient, a shared email, and a migrated email. That means if the recipient opens a member of the shared label or the header of your email in their mailbox, the Message ID will match that of the message in your Gmail sent folder.
Now that GAM is running and we already have the message ID, we go to delete the email. To perform the email deletion from a single-user mailbox. You will need to run the following command.
gam user <user email address> delete messages query “rfc822msgid:<message ID>” doit
Replace the <user email address> with the user email address of the receipt and replace <message ID> with the exact message ID for the email you want to delete.
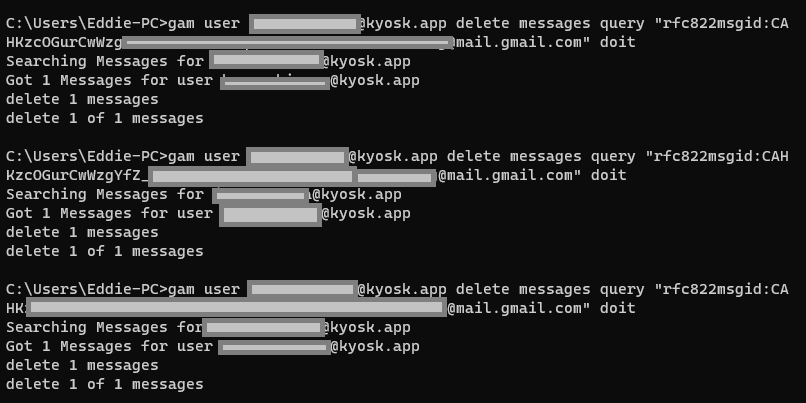
Modify your command and paste the same under your command prompt, the gam command will be something like:
gam user [email protected] delete messages query “rfc822msgid:122eseitntonsbuwn” doit
To delete for all users whom might have received the email us the command :
One can also confirm the email deletion status from the post-delivery message details from the admin email log search by searching the
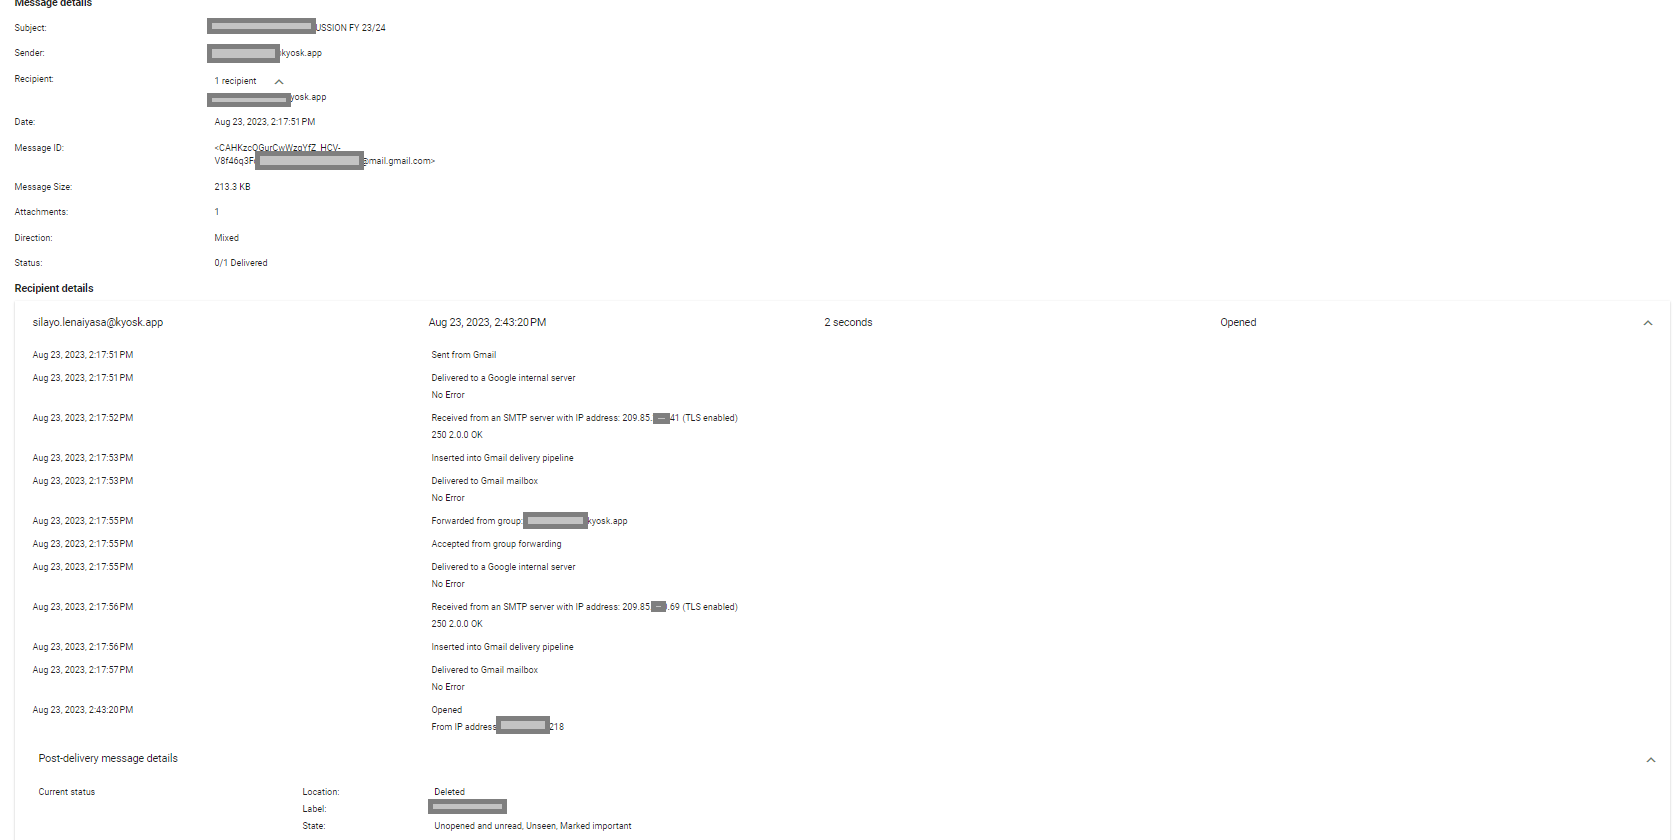
Email Message log post-delivery status

Email Message log post-delivery status
Learn more
- How to Install and Authorize GAM for your Google Workspace:
How to authorize GAM for Google G Suite - GAM Delete Email Messages:
https://sites.google.com/jis.edu.bn/gam-commands/services/gmail#h.deg6l7e9h2i6 - How to find an email message in Gmail with rfc822msgid:
https://support.cloudhq.net/find-email-messages-in-gmail-with-rfc822msgid/#:~:text=That%20means%20if%20the%20recipient,messages%20by%20their%20Message%20ID.
Deleting Users on Windows & Mac
On Windows
- User: gam delete user [email protected]
- Deleting users using a CSV file: gam csv users.csv gam delete user ~email
N.B: The “email” part is the header of the column where the users are stored.
On Mac
- User: gam delete user [email protected]
- Deleting users using a CSV file: gam csv “/Users/user.account/file.csv/” gam delete user ‘~email’N.B: When bulk deleting on mac, you can type gam csv then drag the file into the terminal.
It should populate with path to file, then finish the command i.e. gam delete xxxxx
What if you have exhausted your project quota? Or Need to Reuse a GCP Project
If an account has not enabled Billing on their GCP account they are bound by GCP quota limits.
You have the following options:
- Create a billing account
- Delete old project (you will require 30 days for all the resources to be released)
- Request for quota limit increase from google here will take 2 business days.
- Reuse an existing project on the customer’s GCP account.
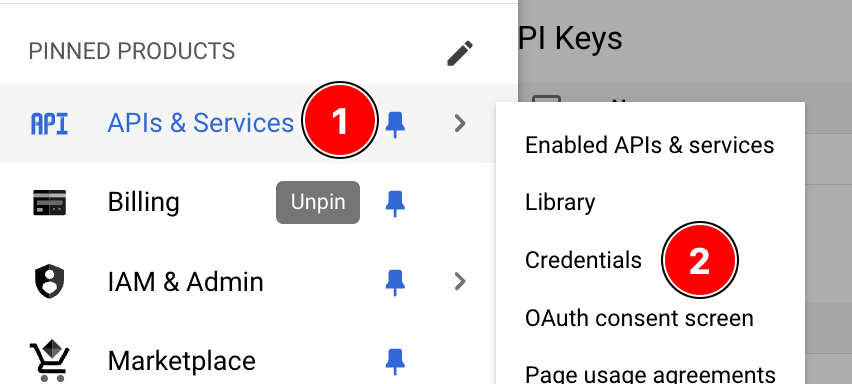
Go to console.cloud.google.com. Navigate to APIs & services > Credentials.
Once there, first create an OAuth Client ID and download the .json file.
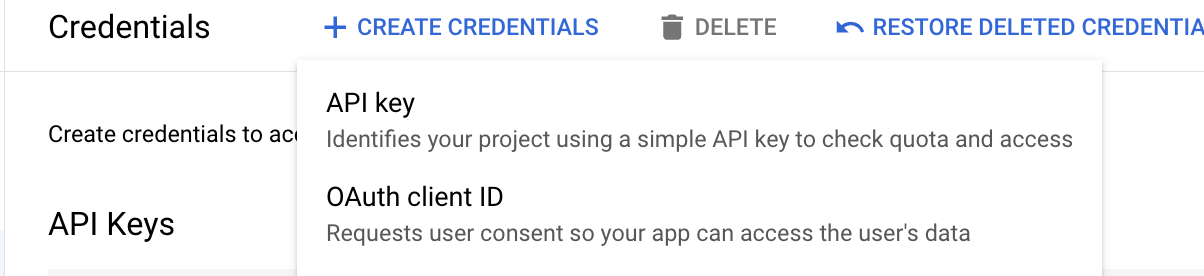
Once there, first create an OAuth Client ID and download the .json file.
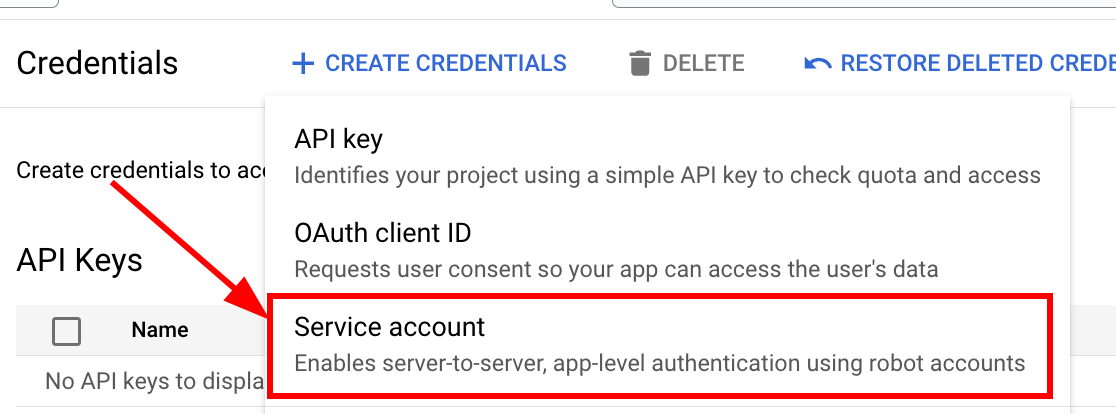
Once done, then create a new service account
Click on the service account created, and navigate to the Keys section.
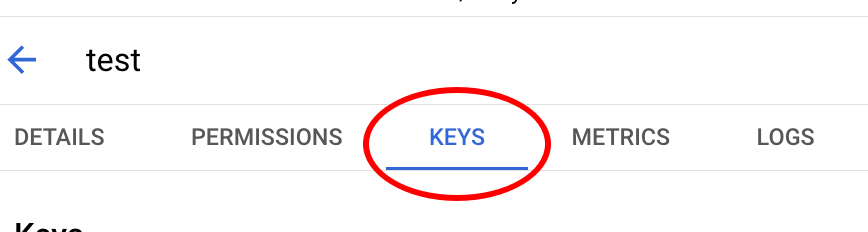
Proceed to create a new service account key.
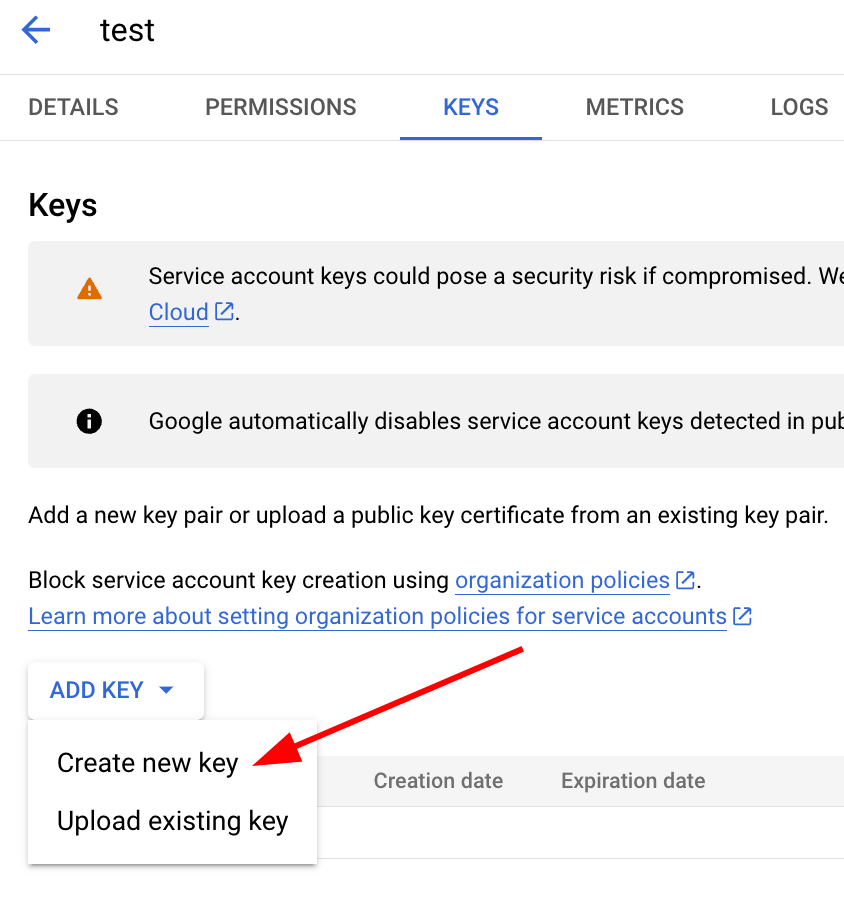
Remember to download it as a JSON file.

Once you have the 2 files, move them to the folder containing the gam configurations.
Then rename as follows:
- Service account key – rename to oauth2service.json
- OAuth 2.0 Client ID – rename to client_secrets.json
Once done, run the command gam oauth create . Do this while inside the gam directory. This will generate the oauth2.txt file.