
Introduction
Managing form responses manually can be time-consuming and error-prone, especially for event registrations, surveys, or applications with strict deadlines.
Google Forms now allows you to automatically stop accepting responses, making form management easier, more accurate, and fully automated.
In this step-by-step guide, you’ll learn how to set automatic response limits in Google Forms using date/time closures or maximum response counts, plus best practices, real-world use cases, and troubleshooting tips
What’s New in Google Forms
As of January 2026, Google Forms introduced built-in automation to close forms automatically—eliminating the need for manual monitoring.
You can now choose between two automatic closure options:
- Time-based closure – Stop responses on a specific date and time
- Response-based closure – Automatically close the form once a set number of responses is reached
This update significantly improves efficiency for teams managing high-volume or time-sensitive forms.
Required Permissions
Only form owners and editors can configure automatic closure settings. Form viewers cannot access these options.
Step-by-Step Setup Guide
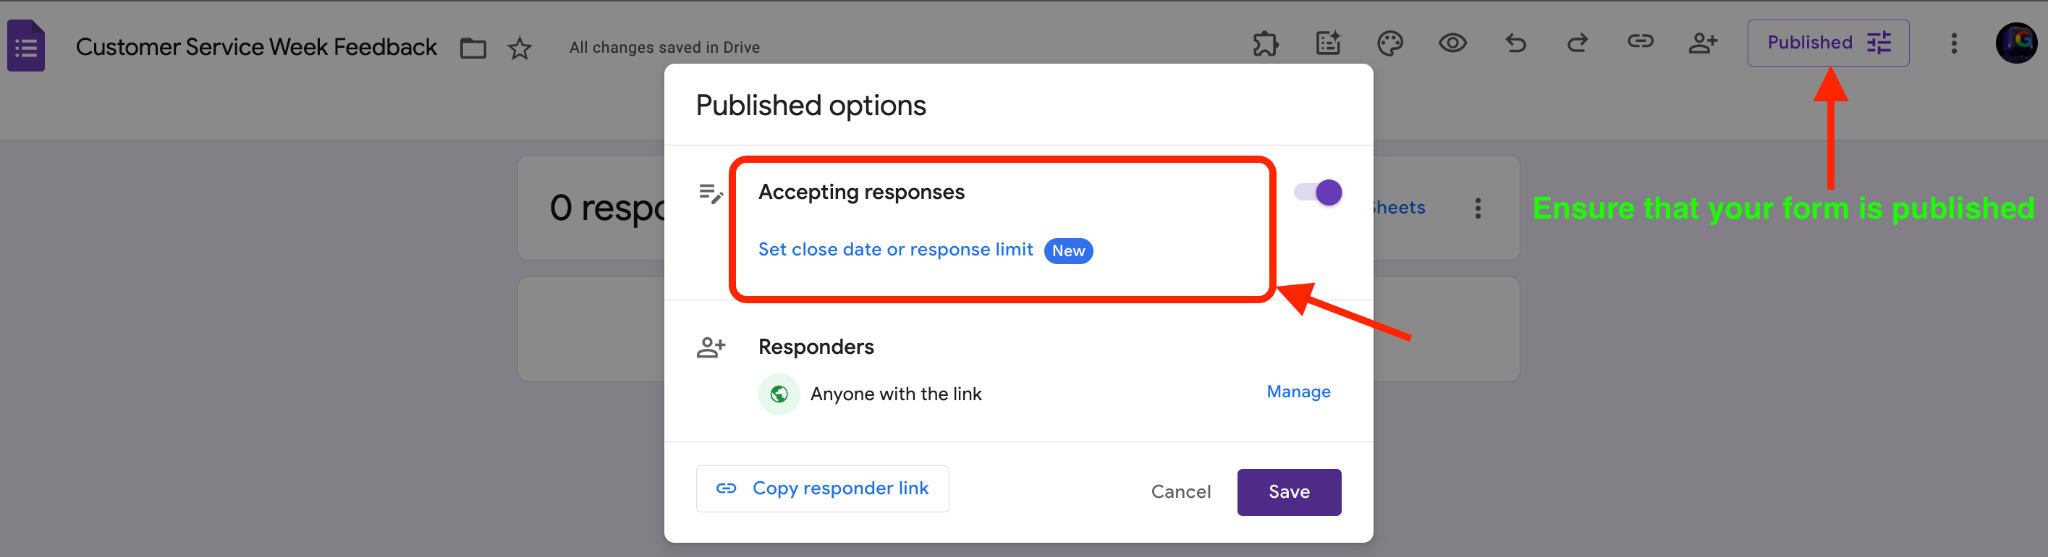
Accessing the Automatic Closure Settings
- Open your Google Form in edit mode
- Ensure your form is published (the feature only appears after publishing)
- Click on the published section
- Select the set close date or response limit
Accessing the Automatic Closure Settings
Important Note: This feature is OFF by default. You must manually enable it for each form where you want automatic closure.
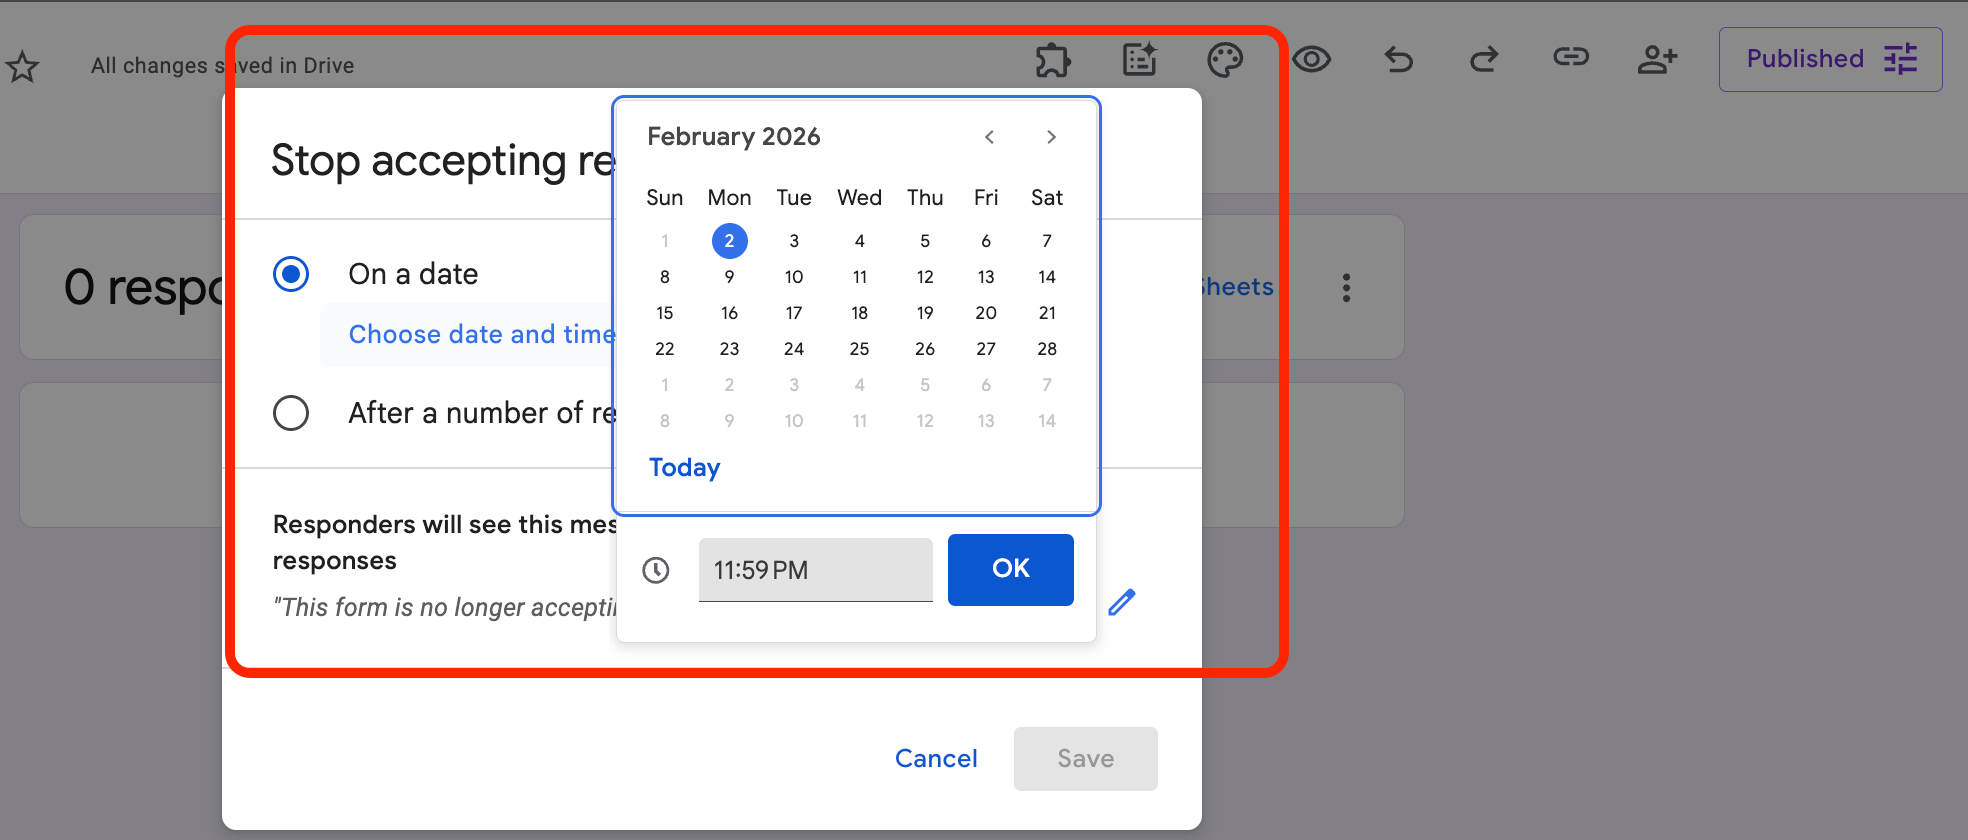
Setting Up Date and Time-Based Closure:
- Enable Time-Based Closure: Toggle on the date/time closure option
- Select Date: Choose the calendar date when responses should stop
- Set Time: Specify the exact time (including timezone considerations)
- Save Changes: Confirm your settings
Setting Up Date and Time-Based Closure
Best Practice: Set your closure time slightly after your actual deadline to account for timezone differences if you have a global audience.
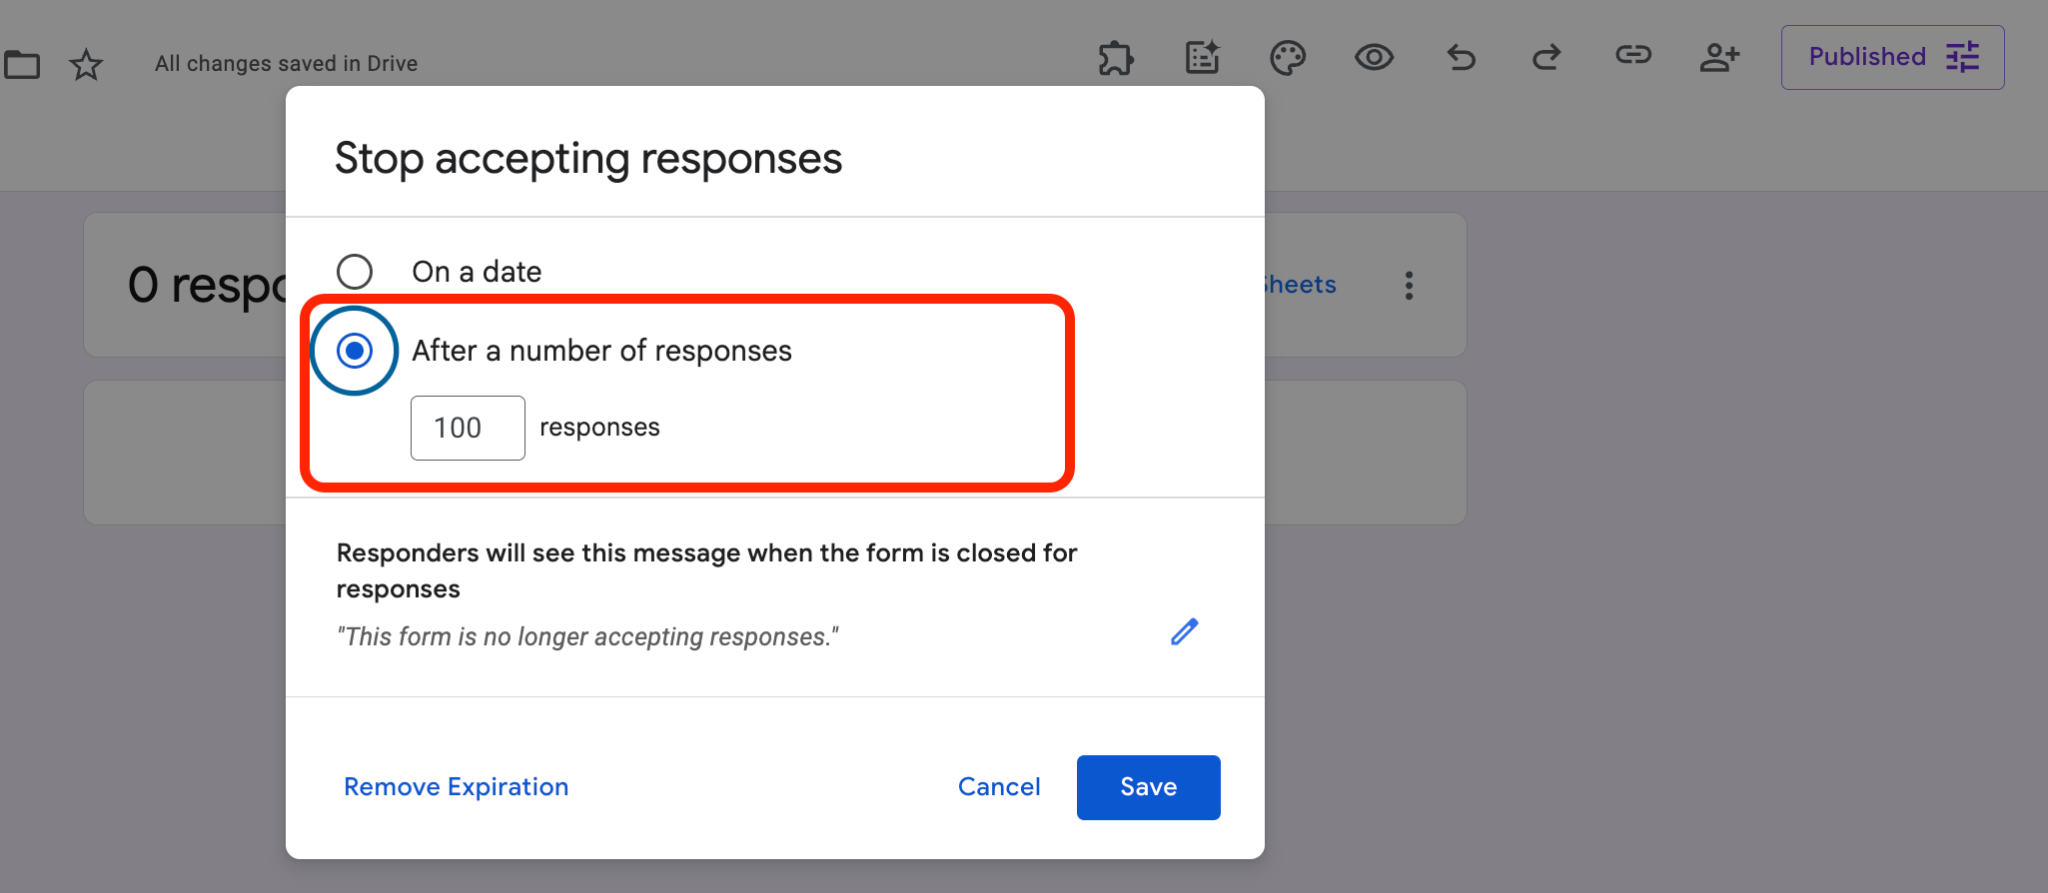
Configuring Response Count Limits
To automatically close your form after a certain number of responses:
- Enable Response Limit: Toggle on the response count closure feature
- Enter Maximum Responses: Type in the exact number of responses you want to collect
Apply Settings: Save your configuration
Configuring Response Count Limits
Pro Tip: For events with limited capacity, set your response limit to match available spots. Consider setting it slightly lower than the actual capacity to account for processing time.
Combining Multiple Closure Methods
While the system allows you to set both date/time and response limits, understand how they interact:
- The form closes when either condition is met first
- If you reach 100 responses before your deadline, the form closes at 100 responses
- If your deadline arrives before reaching the response limit, the form closes at that date/time
What Happens When a Google Form Closes?
Once a form automatically closes:
- New respondents see a message indicating the form is no longer accepting responses
- Existing responses remain accessible in your responses tab
- You can manually reopen the form if needed by disabling the automatic closure settings
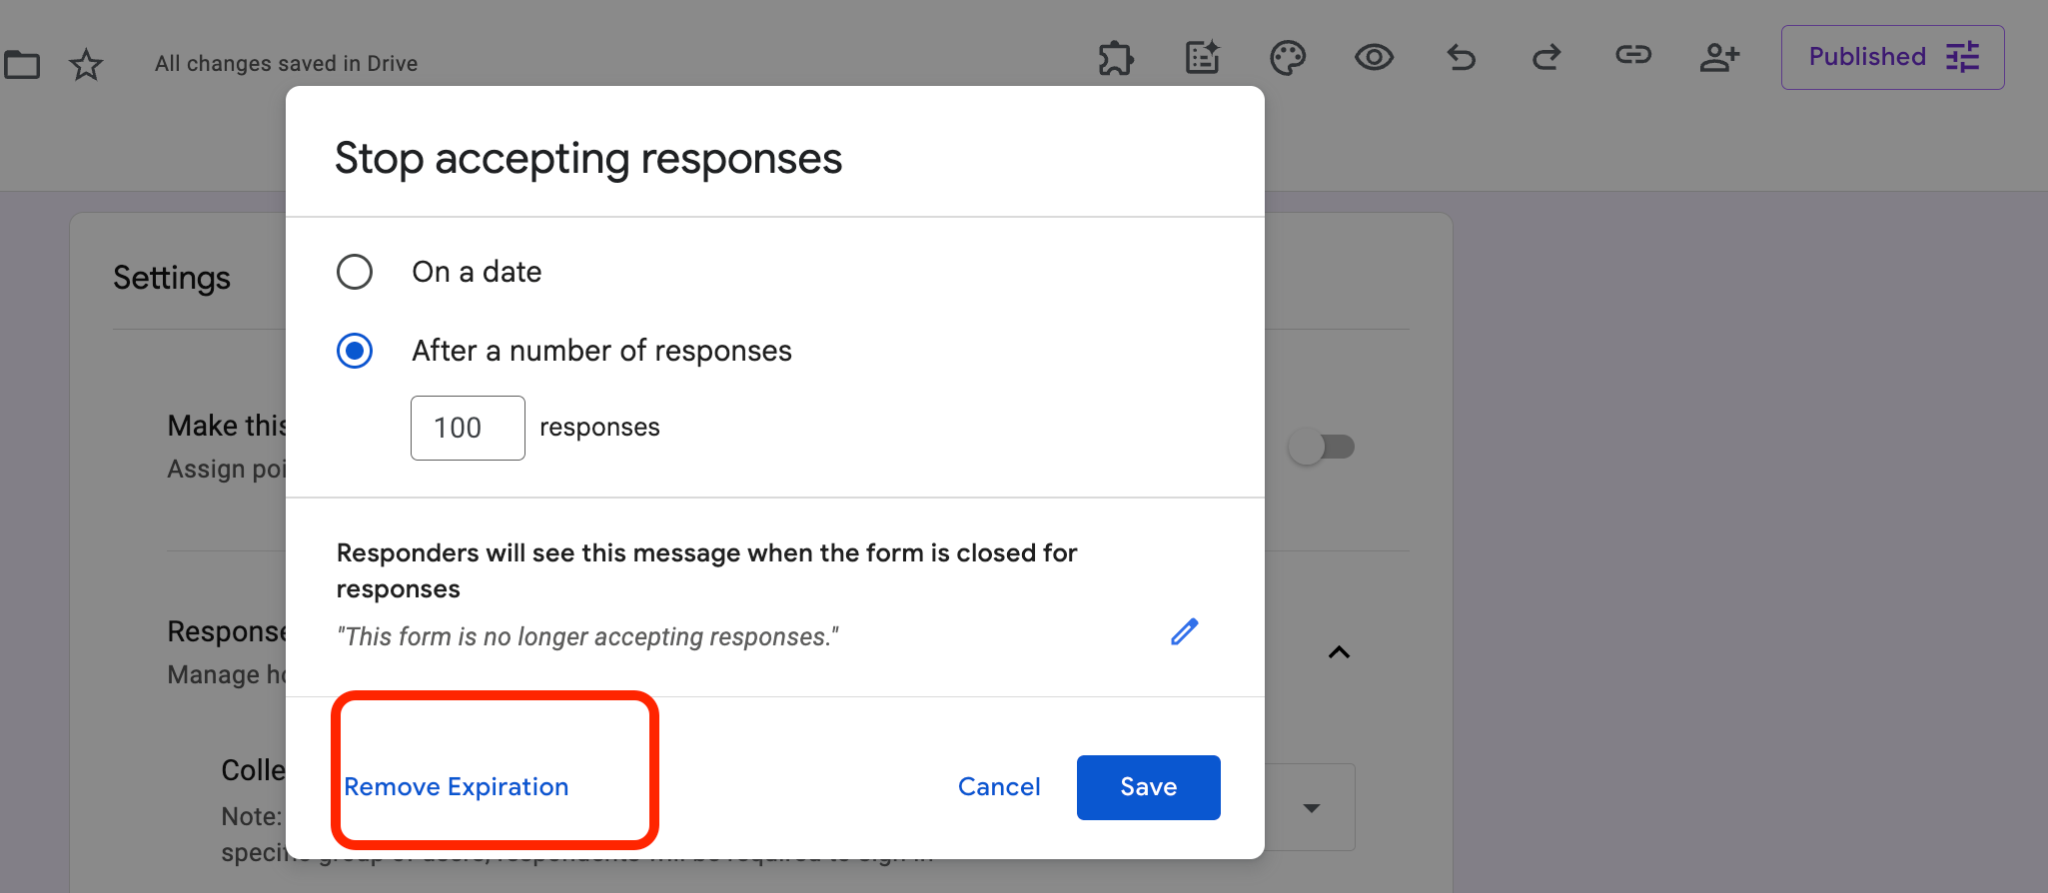
How to Reopen a Closed Form
- Go to Published Section
- Select Remove Expiration
- Save changes
- The form will immediately accept new responses
How to Reopen a Closed Form
Notification Management
Currently, Google Forms does not automatically notify creators when a form closes, so it’s best to set calendar reminders, monitor response counts regularly, and use a manual checklist for time-sensitive forms.
Conclusion
Automatic response limits in Google Forms improve control, reduce manual work, and streamline registrations, surveys, and applications; but remember, the feature must be manually enabled for each form.