


HOW TO HOST A STATIC WEBSITE USING GOOGLE CLOUD STORAGE.
In the realm of web development, static websites remain a popular choice for many projects due to their simplicity and efficiency. They consist of fixed content—HTML, CSS, JavaScript, images, and other media files pre-rendered and directly served to the user’s browser. Unlike dynamic websites, static sites do not require server-side processing or databases, making them fast and straightforward to deploy.
Hosting a static website using Google Cloud Storage is a powerful, cost-effective solution that enhances your site’s performance, security, and reliability. Google Cloud Storage provides the robust infrastructure needed to store and serve your static content, while a service like Cloudflare ensures fast delivery and protects against various online threats.
Domain Verification under Search Console
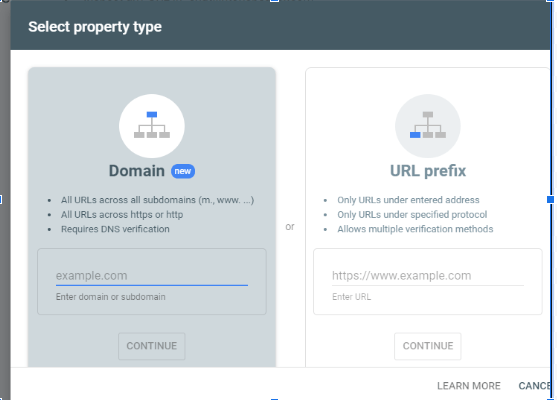
To create a Google storage bucket to host your website you need to create a bucket with the domain or subdomain name that you would want to use to host your website. In order to proceed with this you will need to verify your domain name and ownership within the Search Console by carrying out the following steps.
- Go to Search console https://search.google.com/ and fill in the domain or subdomain you want to verify. Once you add the domain or subdomain you will need to verify the ownership via TXT record.
NOTE: For you to verify the domain you need ‘owner’ permission for the domain under the Google search console to verify a domain.
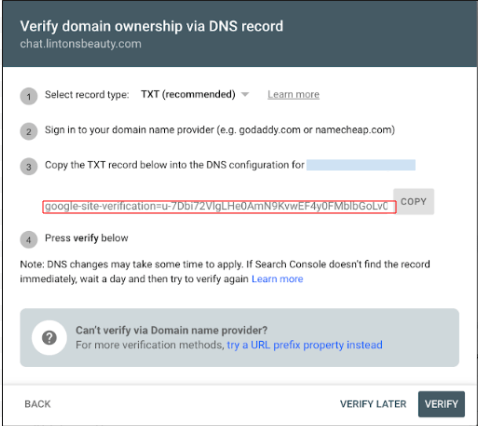
Adding a domain under Search Console
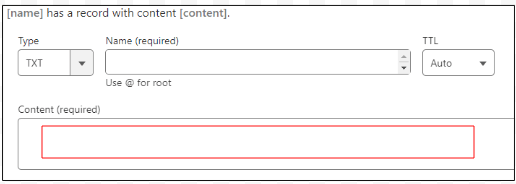
Copy the generated TXT record from the pop-up that appears, we shall need to add the TXT record to our domain DNS manager or Cpanel. In our case, the DNS management is under Cloudflare.
Verification pop-up
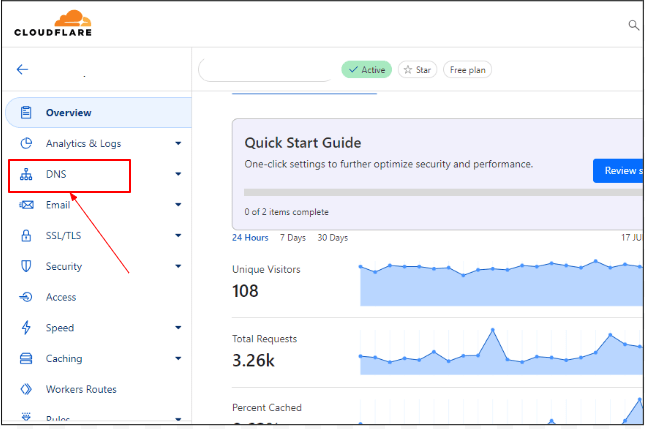
2. Login to Cloudflare and select your domain, then navigate to the DNS section to add the TXT record.
Cloudflare DNS
3. Add a ‘TXT’ under your DNS records and paste the generated record from the Google search console.

Adding the generated TXT record to DNS records
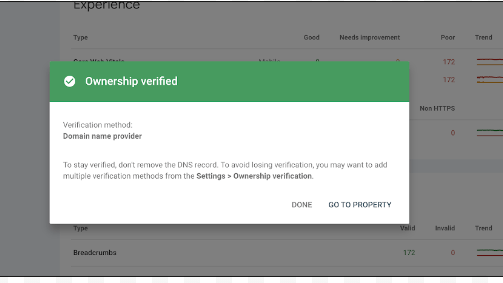
4. Go back to your Google search console and click on the verify button on the popup window to verify ownership of the domain.
Domain verification
Create your Google Cloud Storage Bucket
Step-by-step guide on how to host a static website on a Google Cloud Storage bucket:
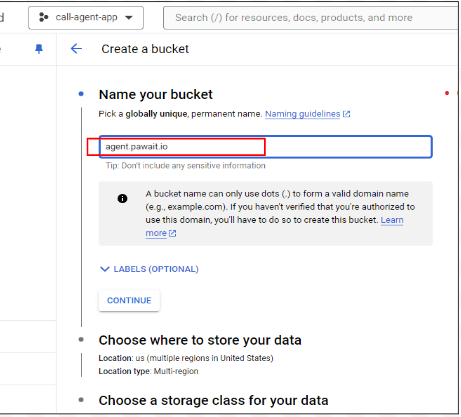
- Create a bucket on Google cloud storage, go to cloud console https://console.cloud.google.com/
- Under cloud console click on cloud storage from the navigation menu
- Create a bucket preferably with the same domain/subdomain name for your website, and configure your bucket to your liking.
Creating a domain-name bucket
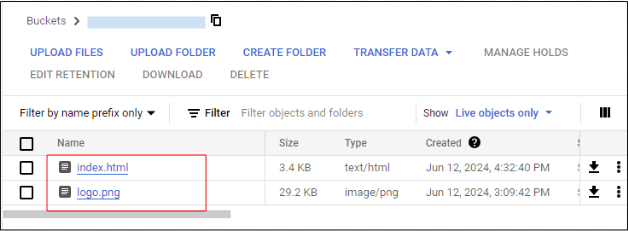
3. Upload website files into the bucket.
Uploaded website files
- Configure public access; set the bucket and its content to be publicly accessible.
Go to the bucket’s permissions and add a member with the all users roles with Storage Object Viewer permissions.
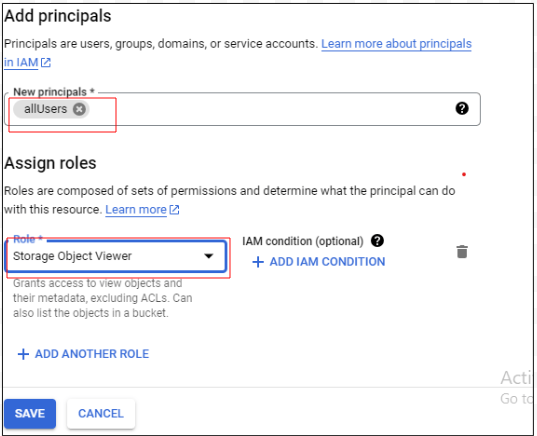
Bucket permissions
- Set the index and error pages ; configure your bucket to serve your índex.html

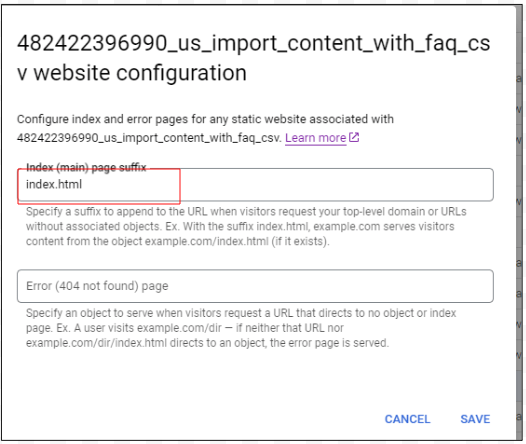
Website configuration
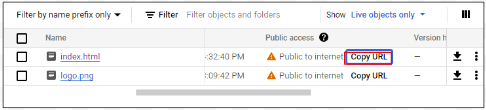
URL for the webpage
When you click on that Url it takes you to the webpage. The URL contains the sub-domain and the domain root of the storage area.
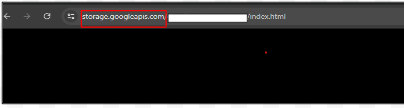
And that’s the url that you need to create a CNAME for on cloud flare DNS. Copy the highlighted domain root and head over to cloudflare DNS.
Configurations Under DNS manager ( Cloudflare)
- Under cloudflare DNS add a record for CNAME, then add ‘@ ‘ under name the under target paste the domain you copied and save
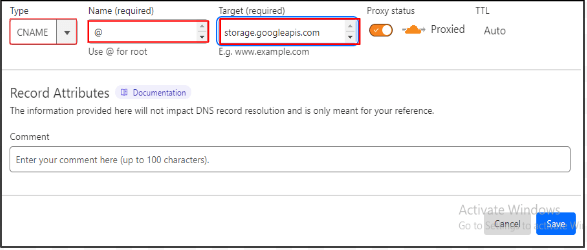
Adding a CNAME record
- Creating page rules; click on rules under the navigation menu, selecting page rules then select a setting which is Redirect URL.
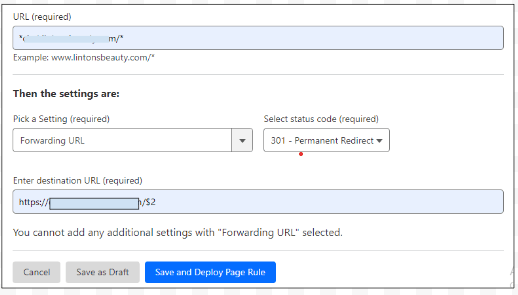
Setting up page rules
- Configure SSL/TLS, set the encryption mode to full, undér edge certificates always use HTTPS, turn on ‘automatic HTTPS rewrites’.
- Go to caching makes sure it is set to standard
- Under network makes sure all the routing rules are on.
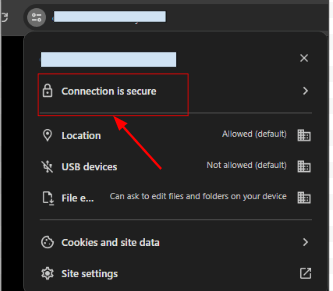
After all these configurations head over to the site and you should be able to notice that the site is up and secure.