


How to Migrate from AWS to GCP using Migrate for Virtual Machines
Migrating virtual machine (VM) instances from AWS to GCP can be a complex task, but it doesn’t have to be. Google Cloud Migrate for Virtual Machines (formerly Velostrata) is a service that simplifies and automates the migration process, minimizing downtime and disruption to your business.
In this blog post, I will walk you through the steps involved in migrating a VM instance from AWS to GCP using Migrate for Virtual Machines. I will cover everything from setting up the service to migrating your VMs and testing the migration.
Whether you are new to cloud migration or have experience with other tools, this blog post will provide you with the information you need to successfully migrate your VM instances from AWS to GCP using Migrate for Virtual Machines with couple of quick steps. This blog takes into assumption you already have a virtual machine or AWS and a project created under GCP.
Network Setup for GCP
First things first is to setup a connection for the two service provider to connect to each other.You can use the default VPC network created on AWS for the migration. Let’s get started on the configuration on GCP’s end:
-
- Go to GCP console and create a custom VPC network with the following details:
- Name: gcp-aws-vpc
- Subnet creation mode: custom
- Subnet Name: vpn-submigrate
- Region: us-central1
- IP stack type: single-stack
- IPv4 range: 10.10.0.0/16
In addition to the default firewall rules created, you will need to configure these rules:
| Name | Protocol | Port |
| gcp-allow-https-server | HTTPS | TPC/443 |
| gcp-allow-http-server | HTTP | TCP/80 |
| gcp-allow-ssh | SSH | TCP/22 |
IAM Setup for AWS
On the source environment (AWS), it’s important to ensure that the account being used has the necessary permissions to carry out the migration. You can use this JSON to configure the necessary permissions for the policy to be used in the AWS console.
{
    "Version": "2012-10-17",
    "Statement": [
        {
            "Effect": "Allow",
            "Action": [
                "ec2:DescribeInstances",
                "ec2:DescribeVolumes",
                "ec2:DescribeInstanceTypes",
                "ec2:DescribeSnapshots",
                "ec2:CreateTags",
                "ec2:CreateSnapshots",
                "ec2:StopInstances"
            ],
            "Resource": "*"
        },
        {
            "Effect": "Allow",
            "Action": [
                "ebs:ListSnapshotBlocks",
                "ebs:ListChangedBlocks",
                "ebs:GetSnapshotBlock",
                "ec2:DeleteSnapshot",
                "ec2:DeleteTags"
            ],
            "Resource": "*",
            "Condition": {
                "StringEquals": {
                    "aws:ResourceTag/m2vm-resource": "snapshot"
                }
            }
        }
    ]
}
A best practice when creating a policy is to attach it to a user group. Basically, this makes it easier and flexible to assign permissions to users as you can add them to the group instead of directly assigning them the policy.
IAM User Creation
For migration purposes, an IAM user account is required to allow Migrate to Virtual Machines to interact with AWS using the AWS public API.
- When creating the user, as a best practice, add them to the user group which has the necessary policy assigned.
- The IAM user will require Programmatic access, which required the creation of an Access Key. You can find the link to create the Access Key on the summary of the created user

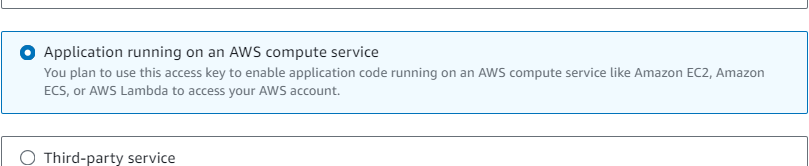
- When choosing “Access Key practices & alternatives”, choose “Application running on an AWS compute service”.
- Once the Access Key is created, you should immediately download it since it cannot be recovered in the future
Creating an AWS Source in GCP
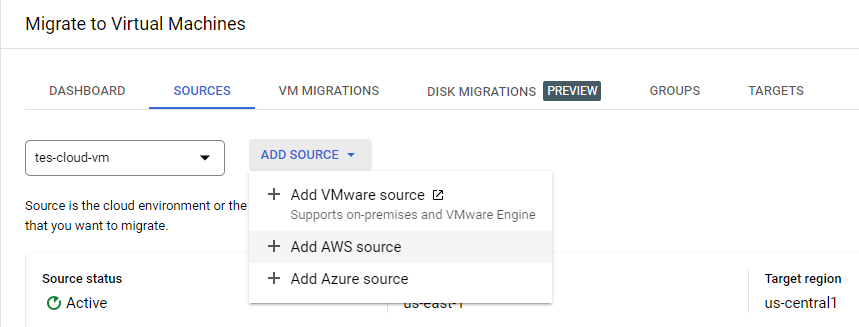
In Google Cloud console select the project, go to Compute Engine – > Migrate to Virtual Machines and select the source section then click on Add Source – > +and select Add AWS Source
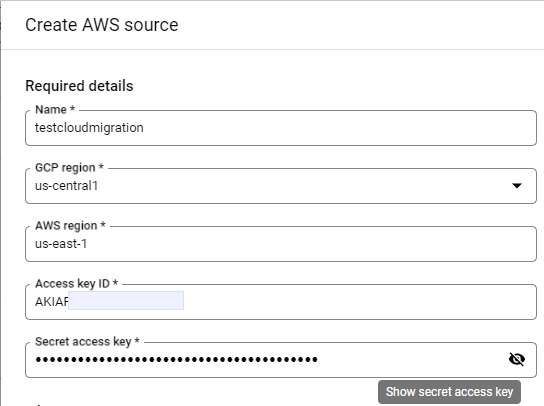
Provide the AWS Access Key ID and Secret access key and click create.
Once Source status is indicated as Active, you will be able to view the AWS EC2 instance you have under AWS in GCP.

Replication of Source VM
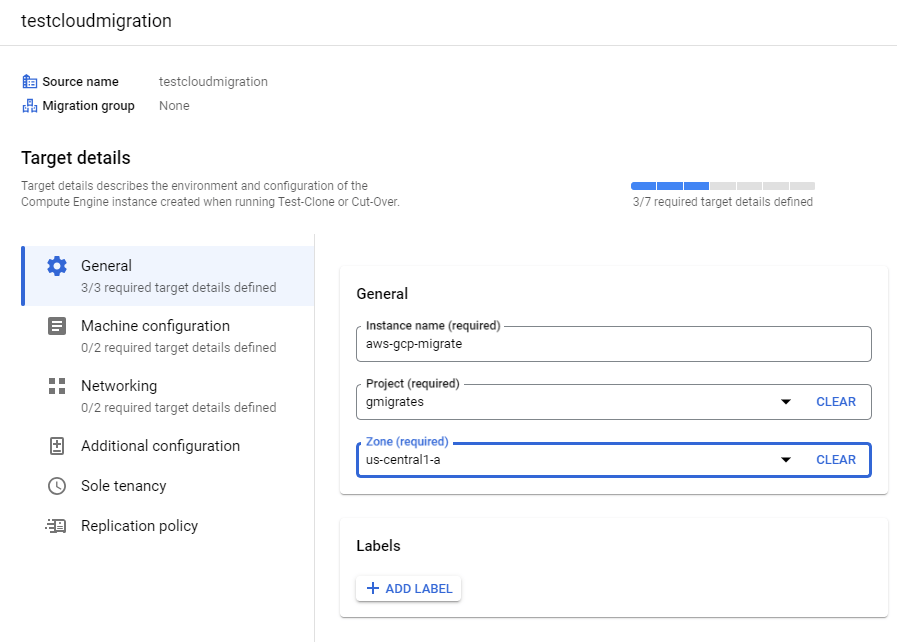
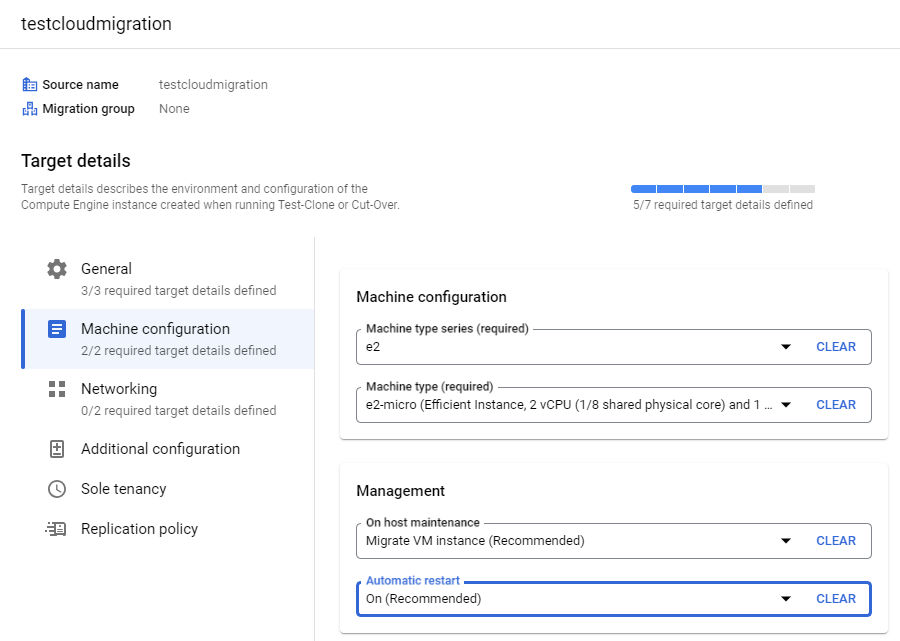
- Go to the Migration section. You can view the Migration VM and select the Source VM and then Click on Edit Target Details.
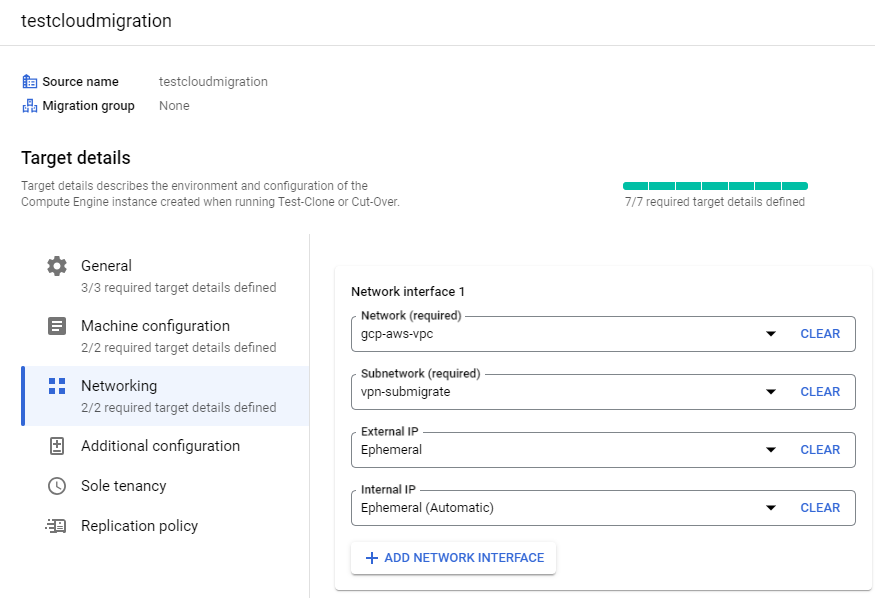
- You will be required to provide 7 details: Instance Name, Project, Zone, Machine type series, network & subnetwork like so:
- Select Migration and start the replication. Wait for a few minutes.

- When the status Replication status changes to Active (Idle), click CUT-OVER AND TEST-CLONE and run the Cut-Over.
NOTE: Ensure that your AWS EC2 instance does not use an image that GCP does not support such as Amazon Linux.
- The instantiated VM instance is now complete. You can view the VM instance in your Google Cloud console.

Replication of Multiple Source VMS using Groups
- You can follow the earlier steps used when Creating an AWS Source in GCP to create a new VM migration source which will display the AWS EC2 instances.
- Select the Source VMs and click ADD TO GROUP.

- In the pop-up, specify the name of a new group if you don’t have an already existing group.
- You should be able to view the AWS EC2 instances in the newly created Migration group in Google Cloud console.
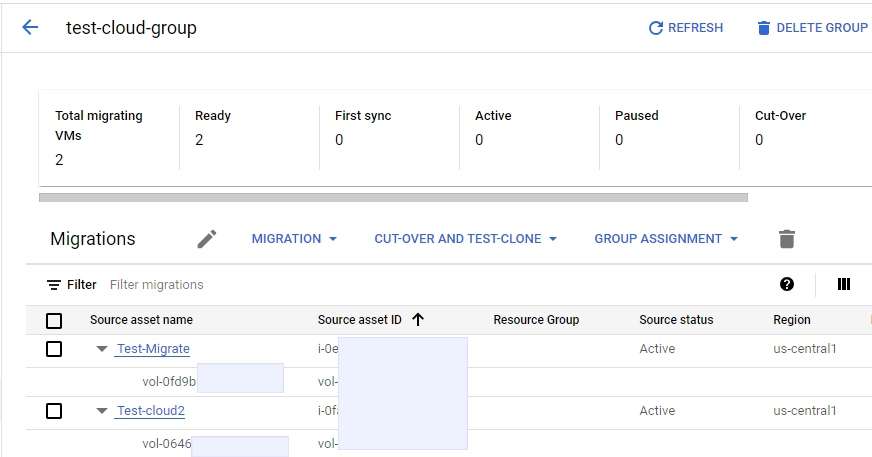
- Just like with the replication of a singular VM instance, click Migration – > Start Replication.

- Once finished, select Edit Target Details and you will be required to provide details of the Target Configuration.
- Unlike before, you will be required to specify the Instance Names of the Source VMs.

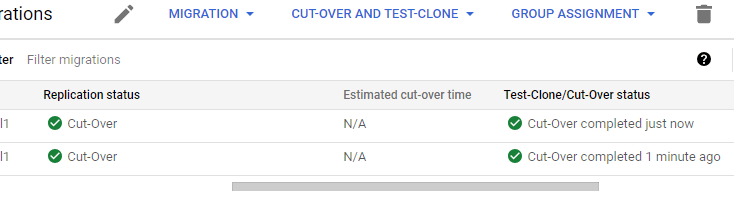
- After specifying the target details, you should then click on CUT-OVER AND TEST-CLONE and select Cut-Over.

- Once the Test-Clone/Cut-Over column states Completed, you can then go to the VM Instances page and view the migrated VM instances.

Additional Resources:
- Migrate to Virtual Machines from an AWS source: https://cloud.google.com/migrate/virtual-machines/docs/5.0/how-to/create-an-aws-source#create-an-iam-policy
- Enabling Migrate to Virtual Machines services: https://cloud.google.com/migrate/virtual-machines/docs/5.0/how-to/enable-services